
Character to Video Wizard — Build a 4-Step AI Pipeline UI in Minutes
The Idea
One prompt to Cody: “build a character-to-video wizard”. Four minutes later — a fully wired, dark-themed, session-persistent 4-step pipeline UI running in the IDE browser.
Step 1 — Drop Photo      upload portrait → identity anchor
         ↓
Step 2 — Character Sheet  gpt-image × 2: initial portrait → full reference grid
         ↓
Step 3 — Storyboard       gpt-image: 16-panel 4×4 cinematic sequence
         ↓
Step 4 — Video            Seedance 15s 1080p 16:9 — storyboard + char sheet as dual inputs
The Request

Product Owner
PO
build a character-to-video wizard — drop photo → char sheet → storyboard → video. very user friendly interface using our dynamic ui skill
use prompts from the tutorial — auto-manual.quadcode.ai/posts/how-to-make-game-animation — and be sure to use gpt-image-2 and Seedance models in the pipeline

Full-Stack Engineer
Cody
gpt-5.1-codex
Checked the dynamic UI skill, built a 4-step stepper with left rail nav, session restore, editable prompts on each step, and bridge VideoPlayer on step 4. Single HTML file, zero dependencies.
Step 1 — Drop Photo
The first screen sets up the entire pipeline. Character fields (name, role, class, style) and a scenario textarea are all on step 1 — so by the time the user hits Continue, the wizard has everything it needs to build all downstream prompts automatically.
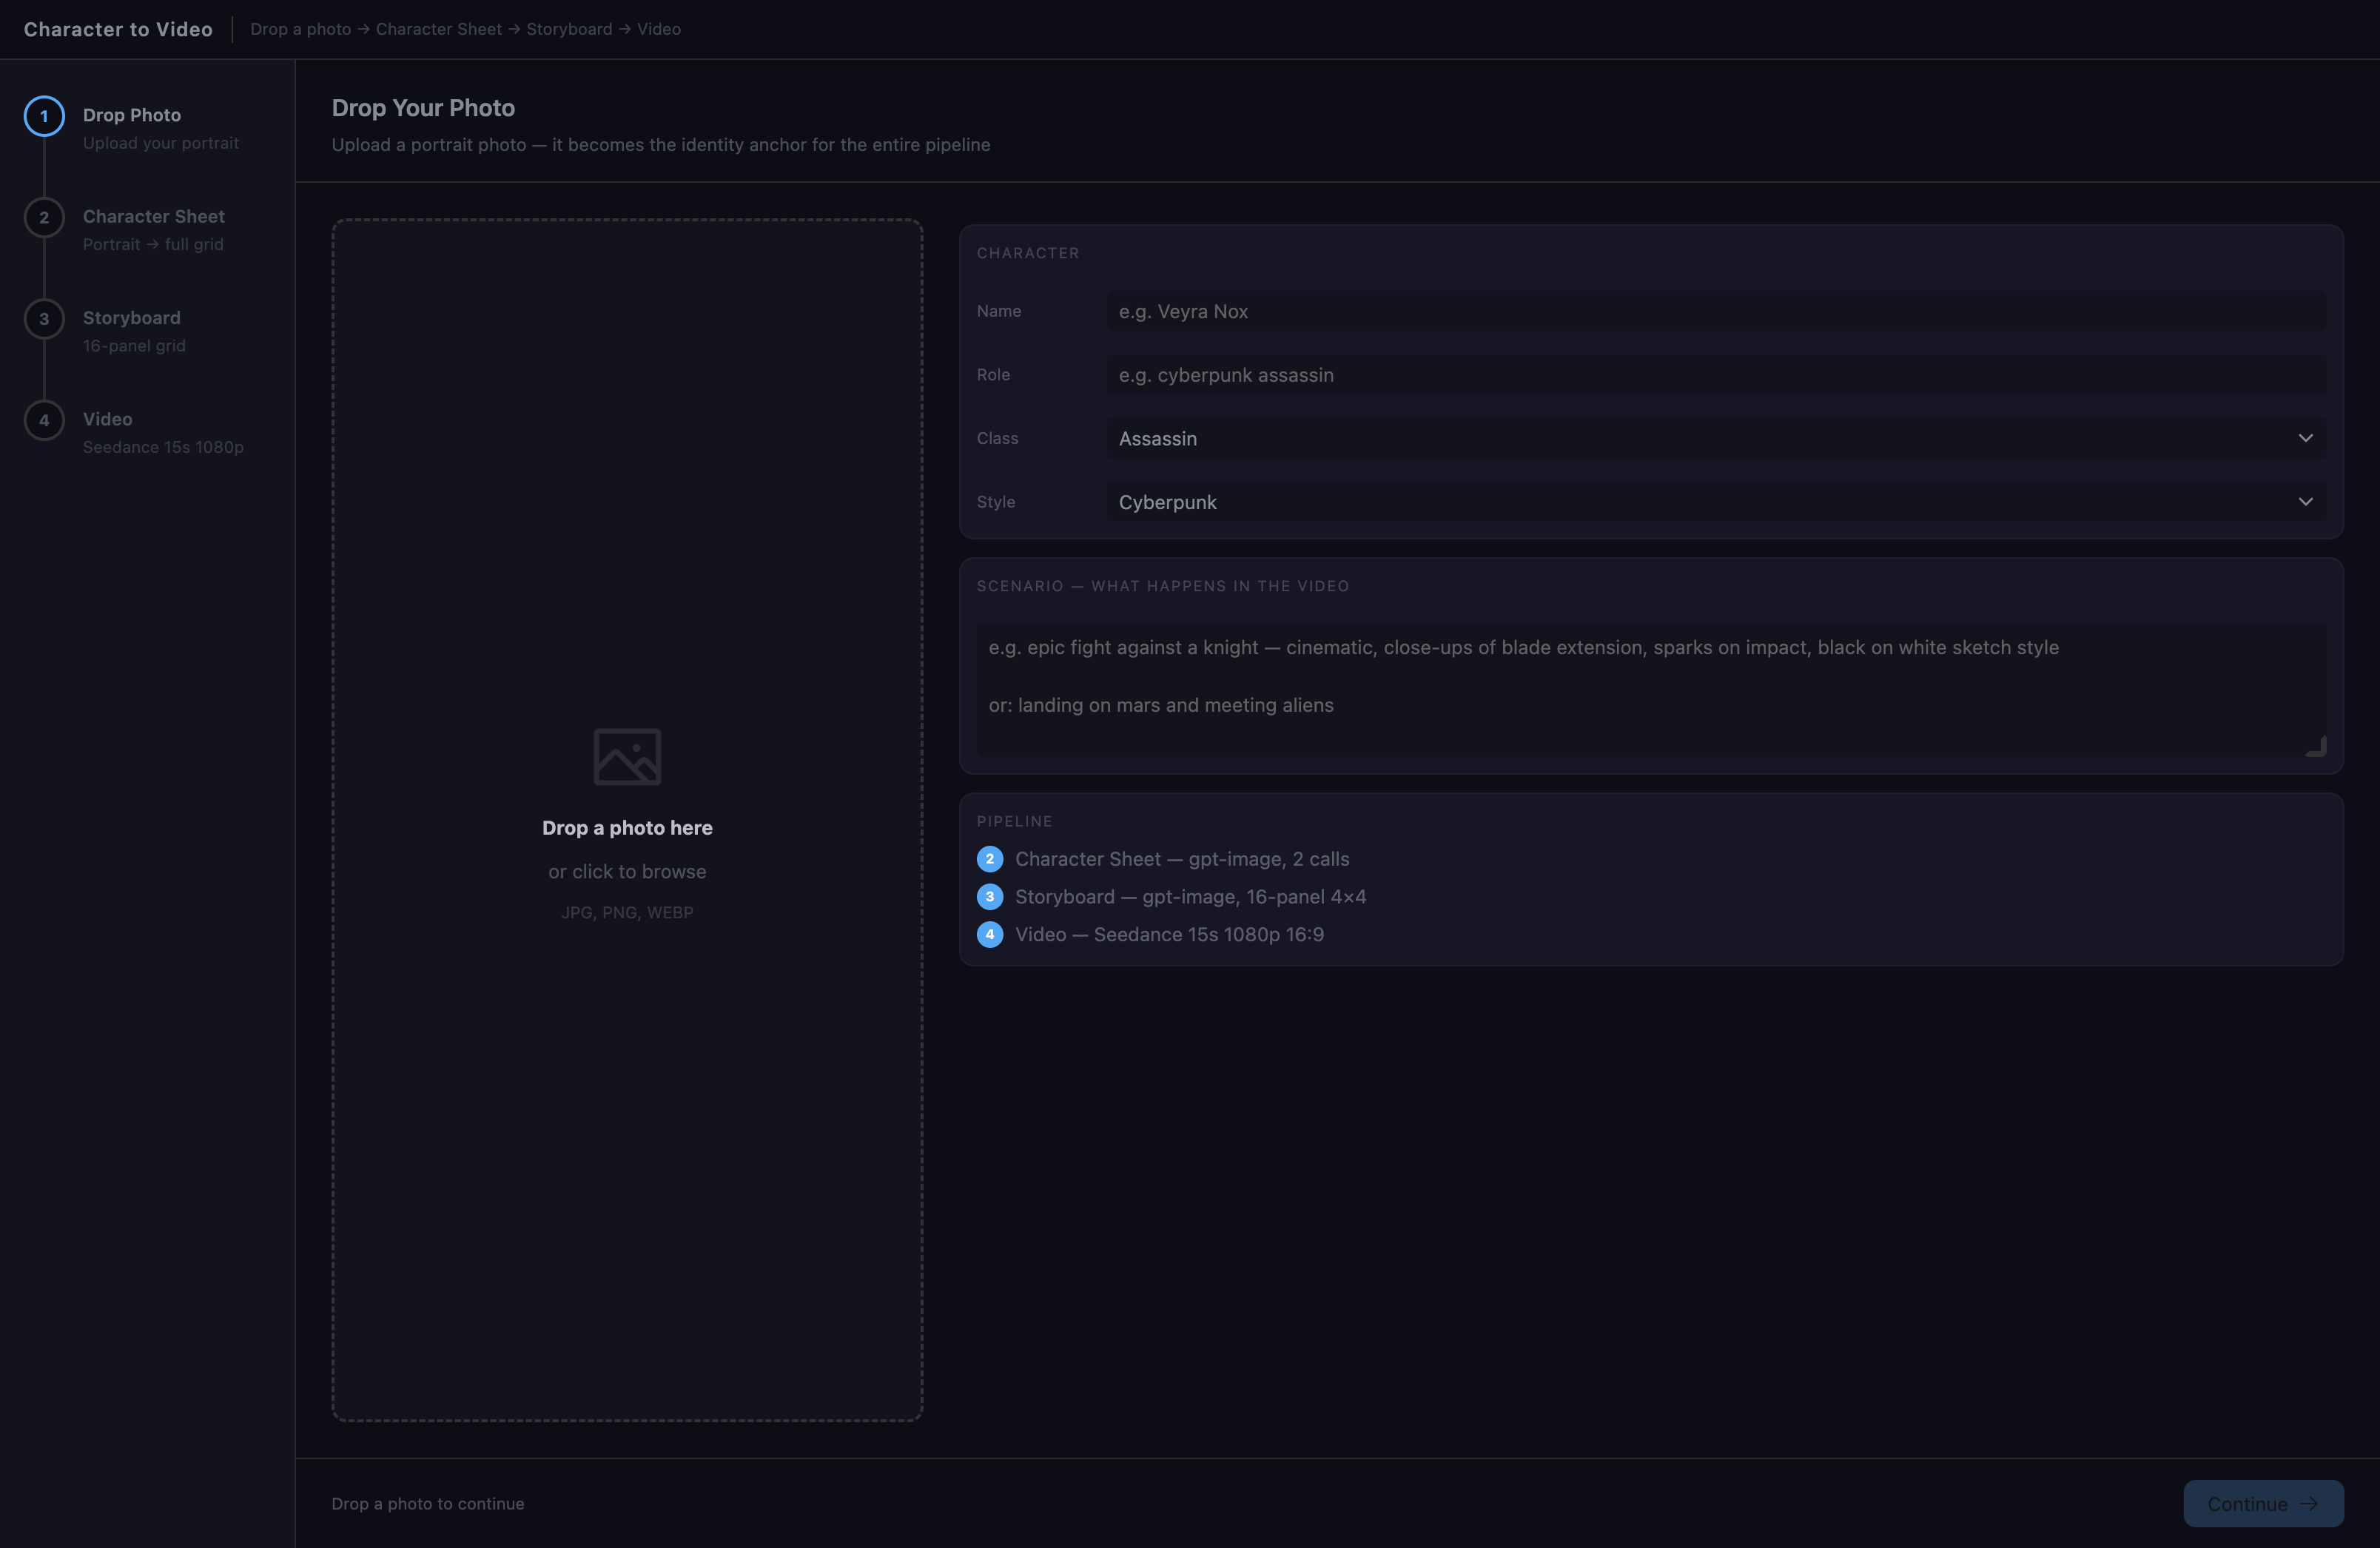
Drop a portrait photo, fill in the character details, and describe what happens in the video. The pipeline overview at the bottom shows exactly what will be generated in steps 2–4.
Pattern: scenario first. Put all inputs on the first screen. The user describes what they want once — the wizard builds every prompt from that single description. No re-entering context on each step.
Step 2 — Character Sheet
Two sequential gpt-image calls. The first locks identity (initial portrait), the second uses it as an anchor to produce the full reference grid.
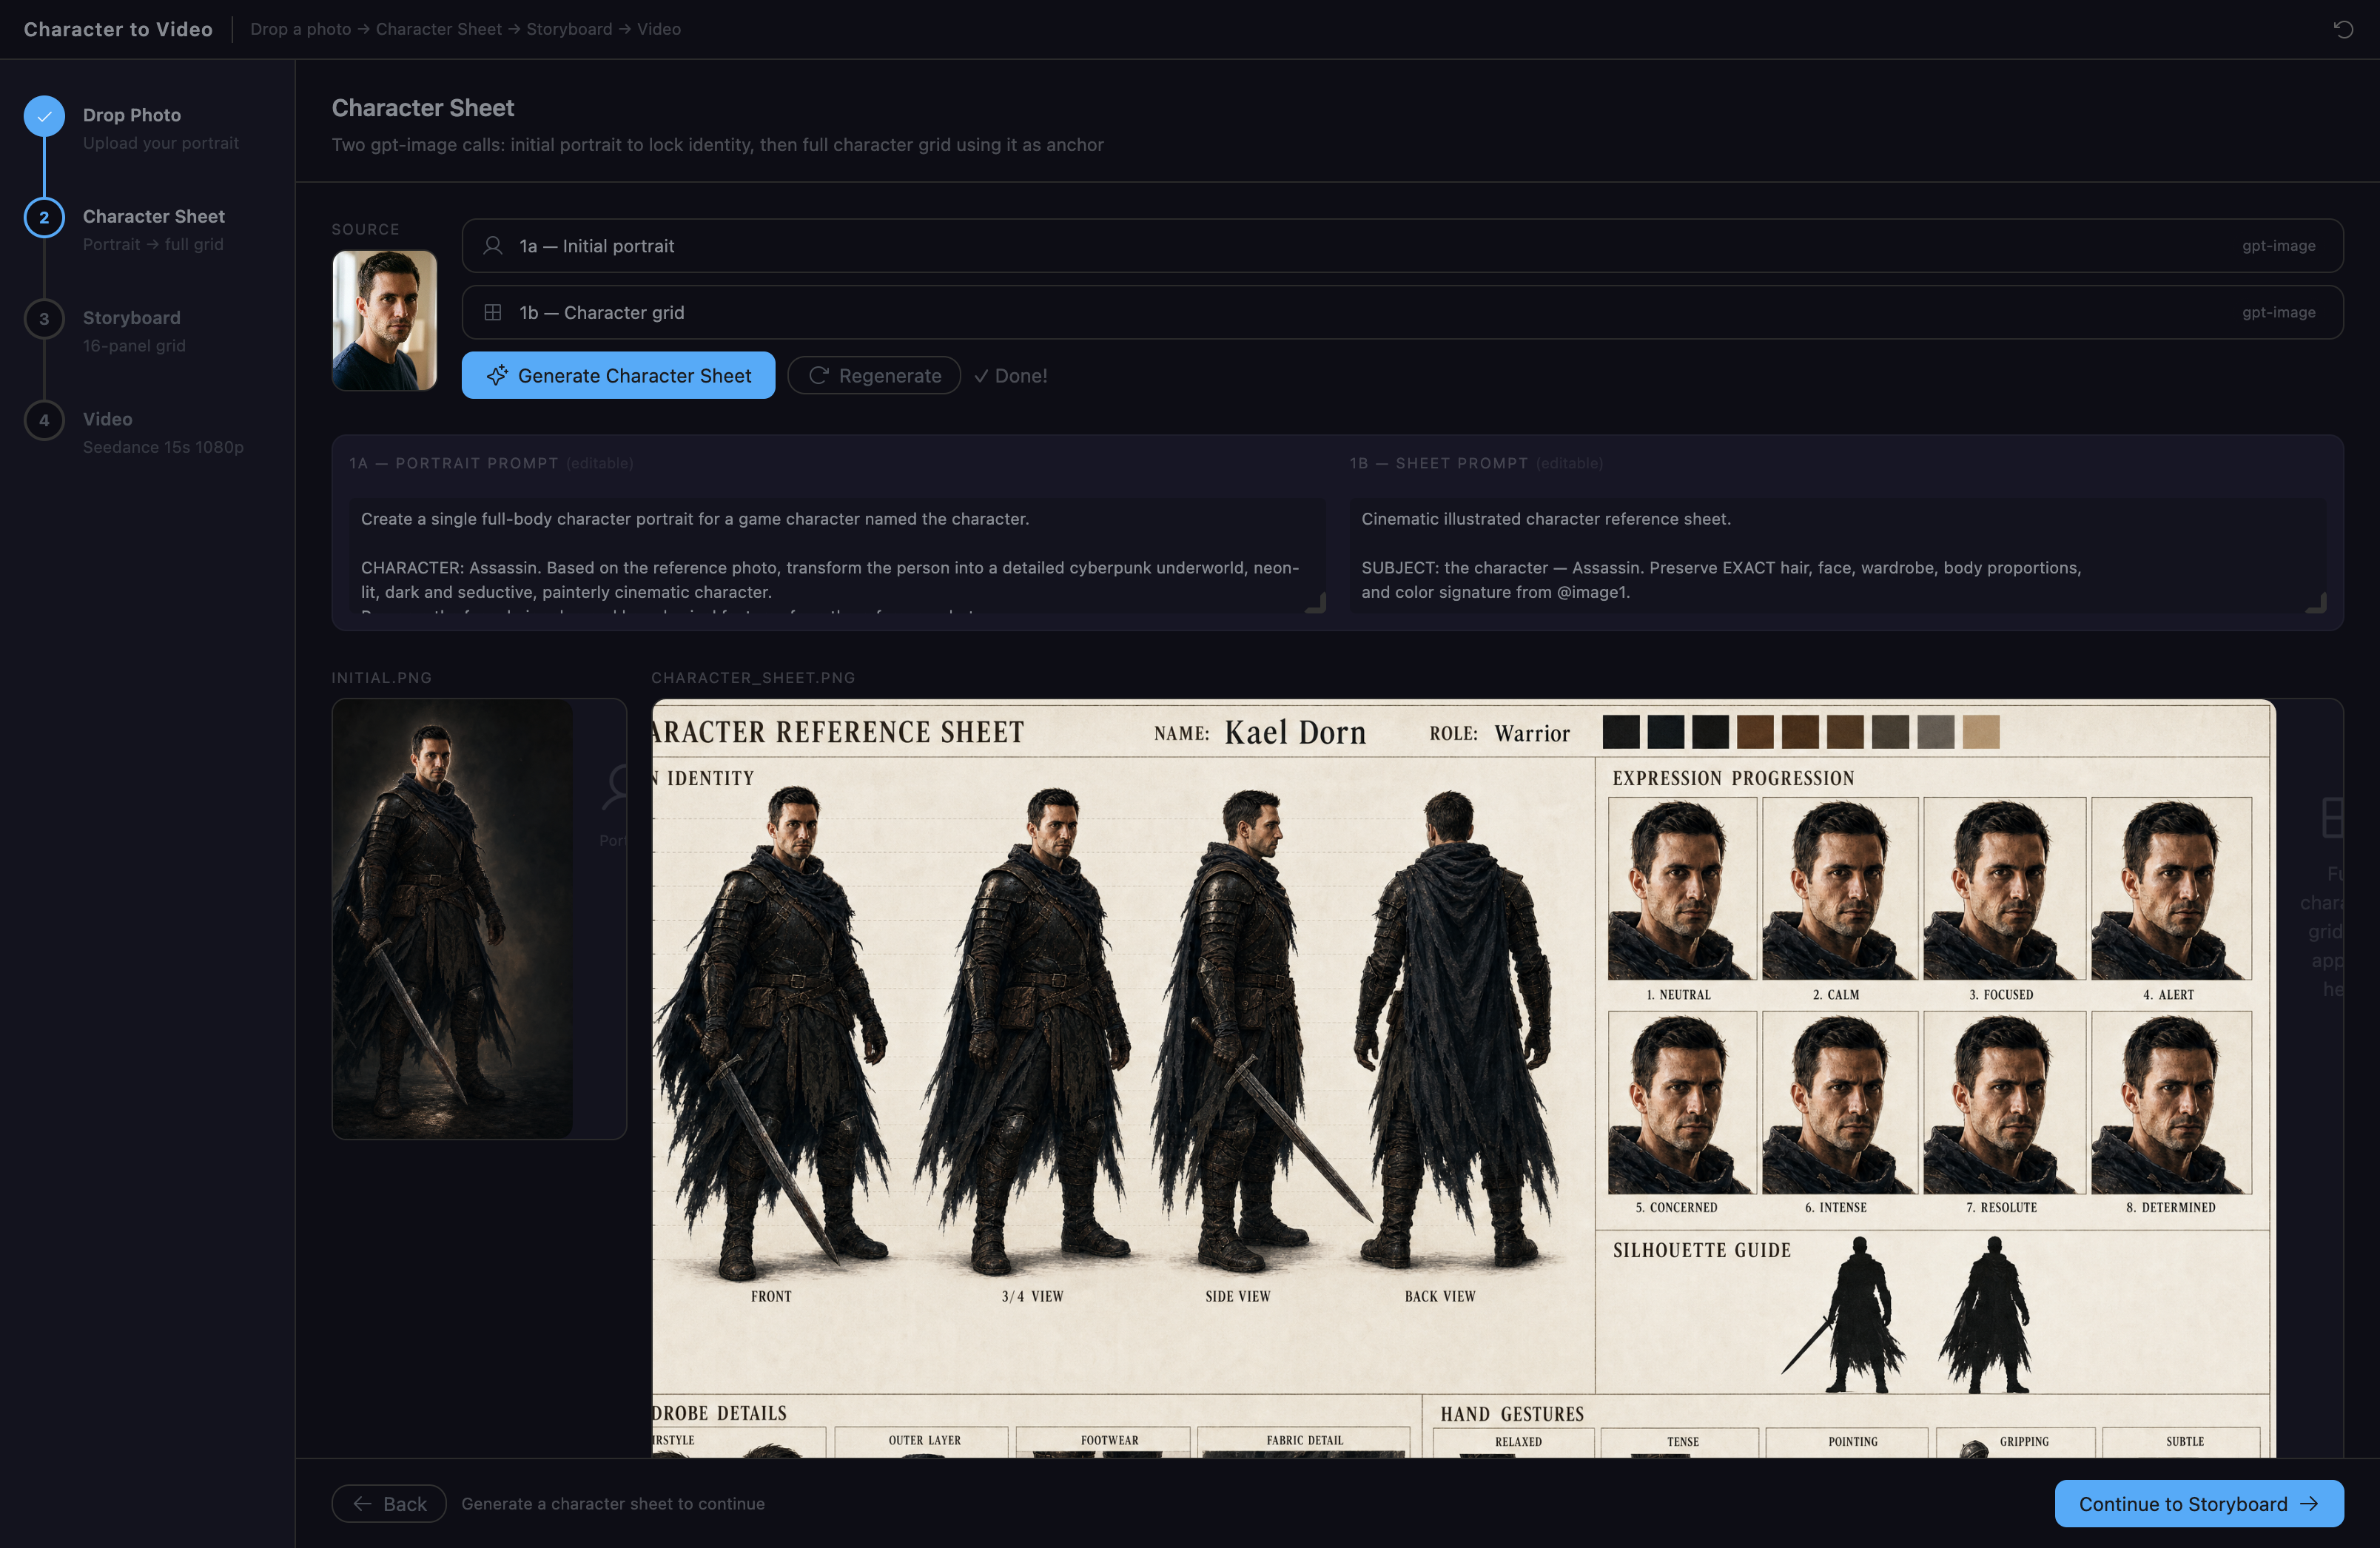
Both prompts are shown as editable textareas — pre-filled from the scenario, but fully tweakable before generating. The pipeline badges (1a — Initial portrait / 1b — Character grid) show which call is running.
The character sheet scrolls — the full grid (FRONT/3/4/SIDE/BACK views, 8 expressions, silhouette guide, wardrobe details, hand gestures) is all visible without leaving the step.
Pattern: show the prompts. Users trust the pipeline more when they can see and tweak what’s being sent. Pre-fill from the scenario, let them edit, then generate.
Step 3 — Storyboard
Single gpt-image call — 16 panels in a 4×4 grid. The character sheet is passed as the visual anchor to keep appearance consistent across all panels.
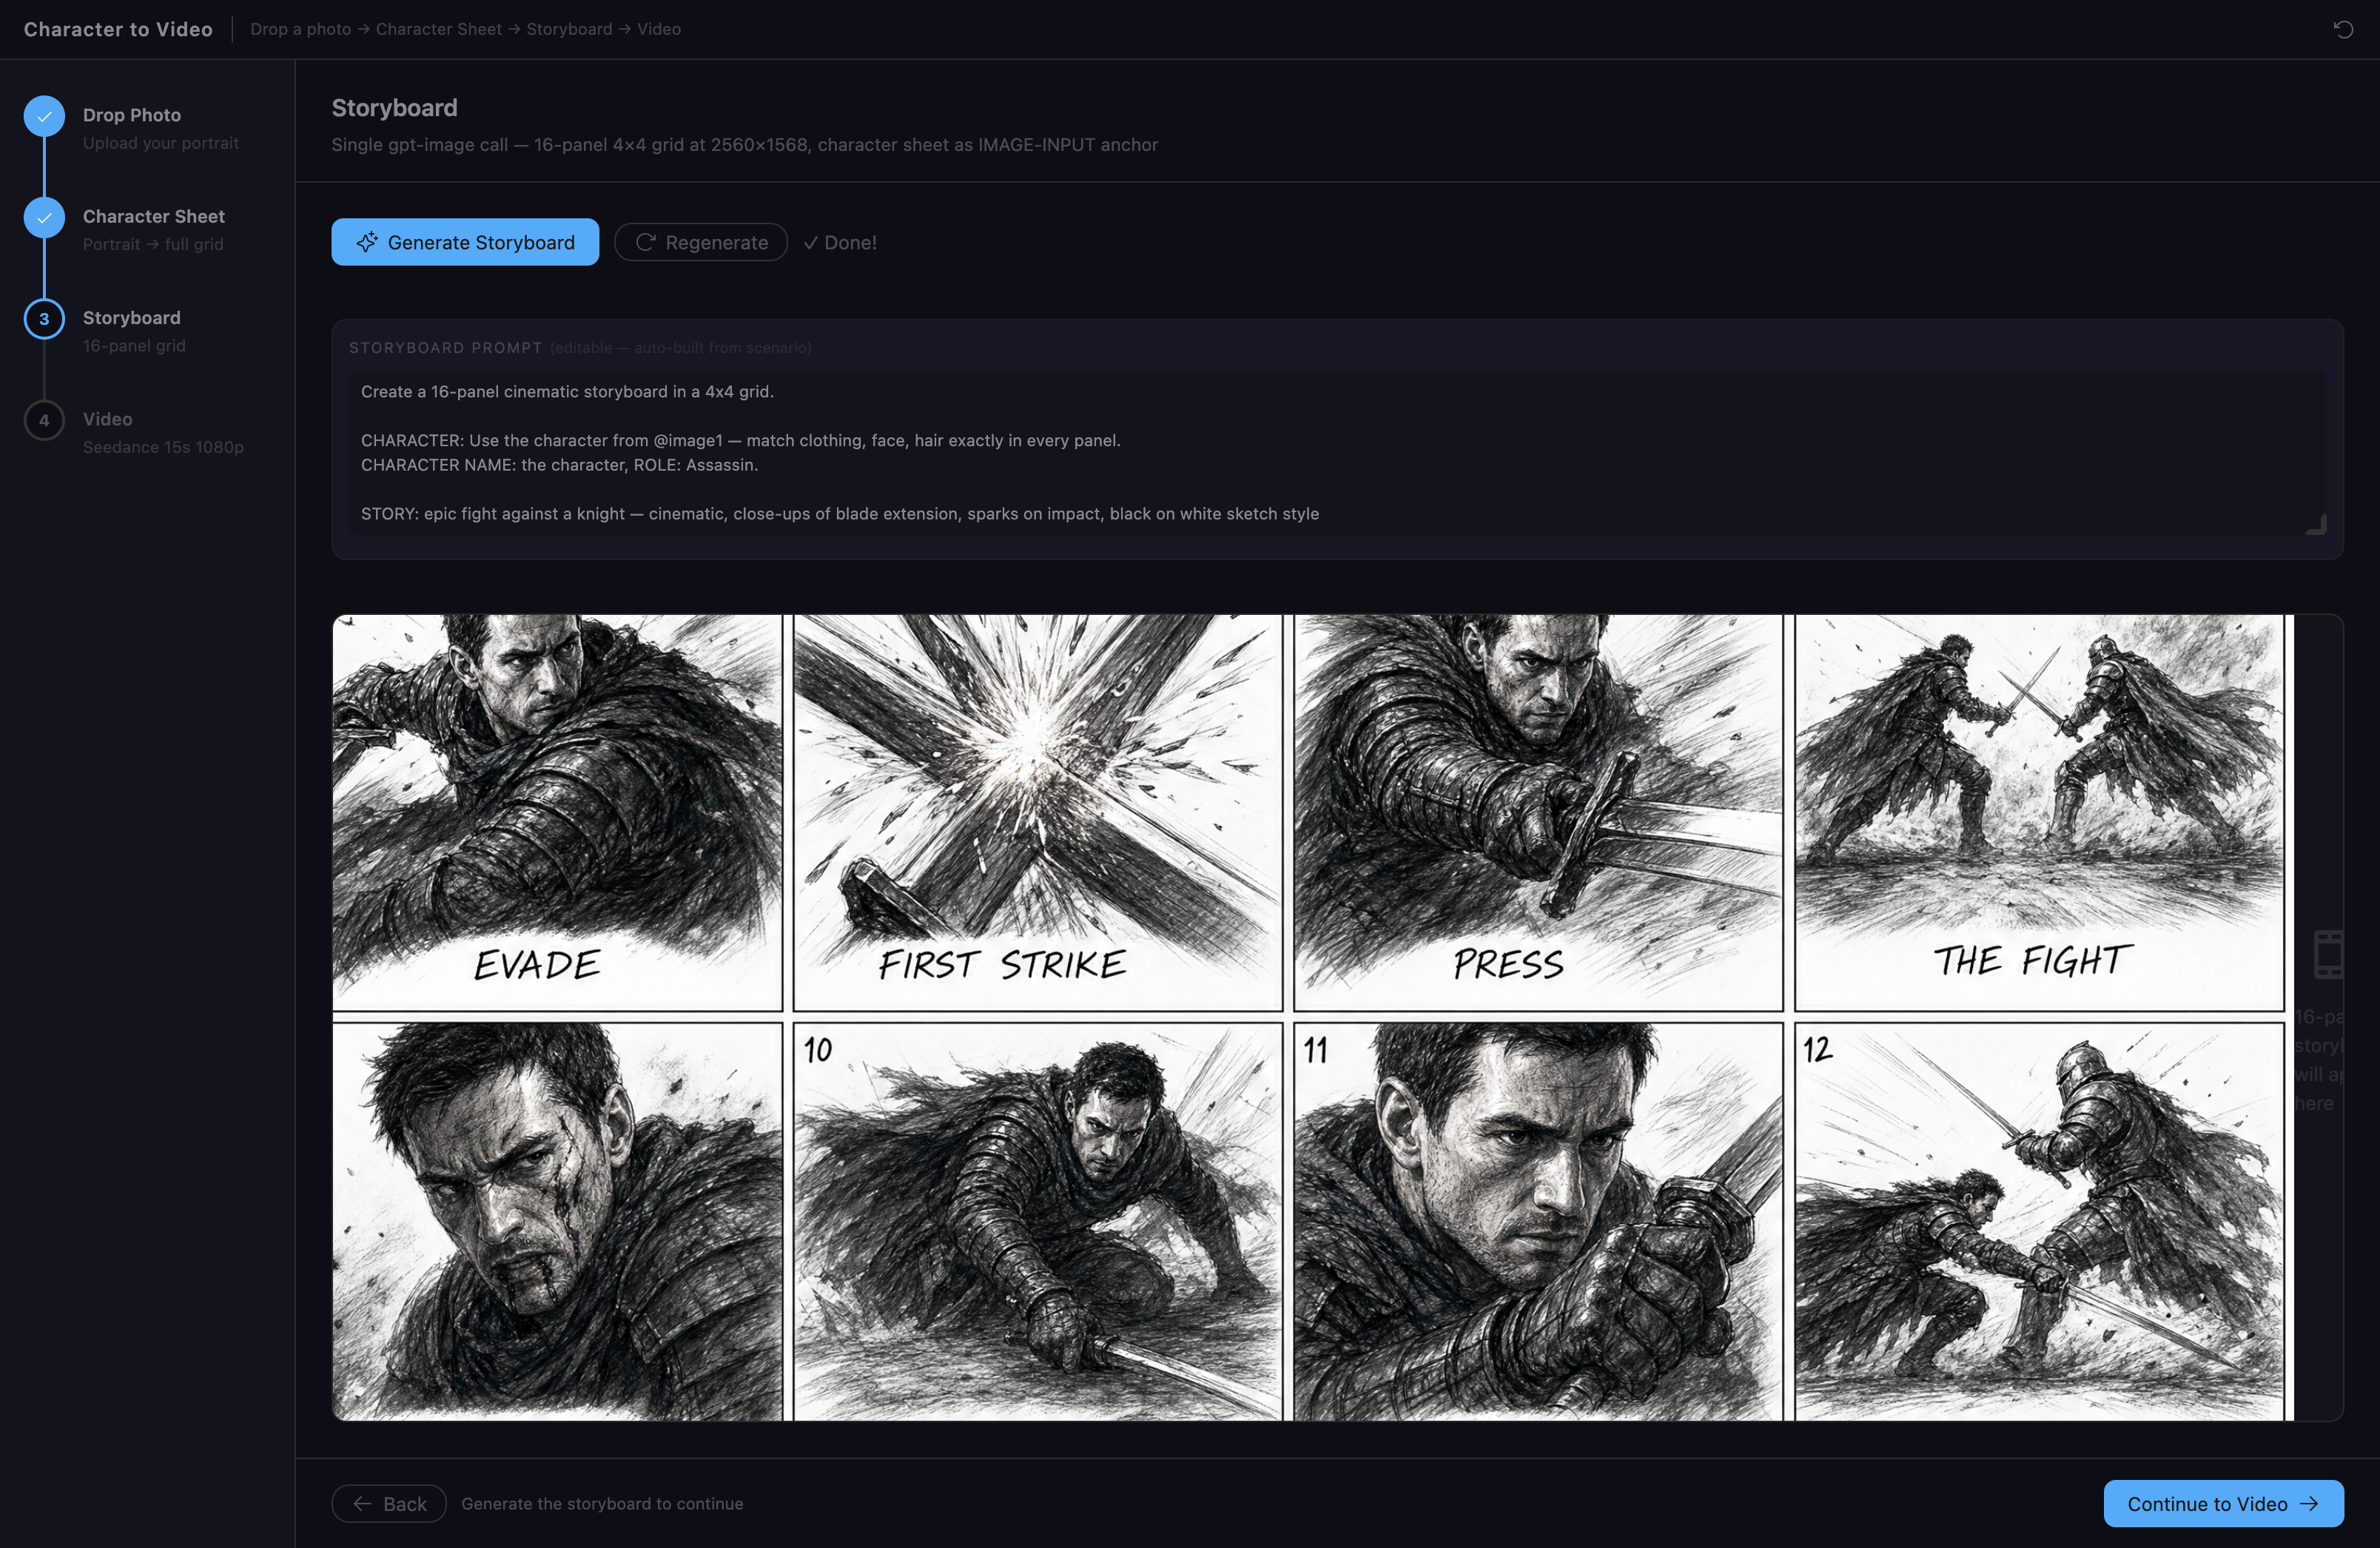
The storyboard prompt is auto-built from the scenario field on step 1 but fully editable. Each panel gets a shot size (ECU/CU/MCU/WIDE), action description, and label — the model follows the sequence closely.
Pattern: explicit panel sequence. Don’t let the model invent the story. Name each panel, specify shot sizes, describe the action. The video in step 4 follows the storyboard closely.
Step 4 — Video
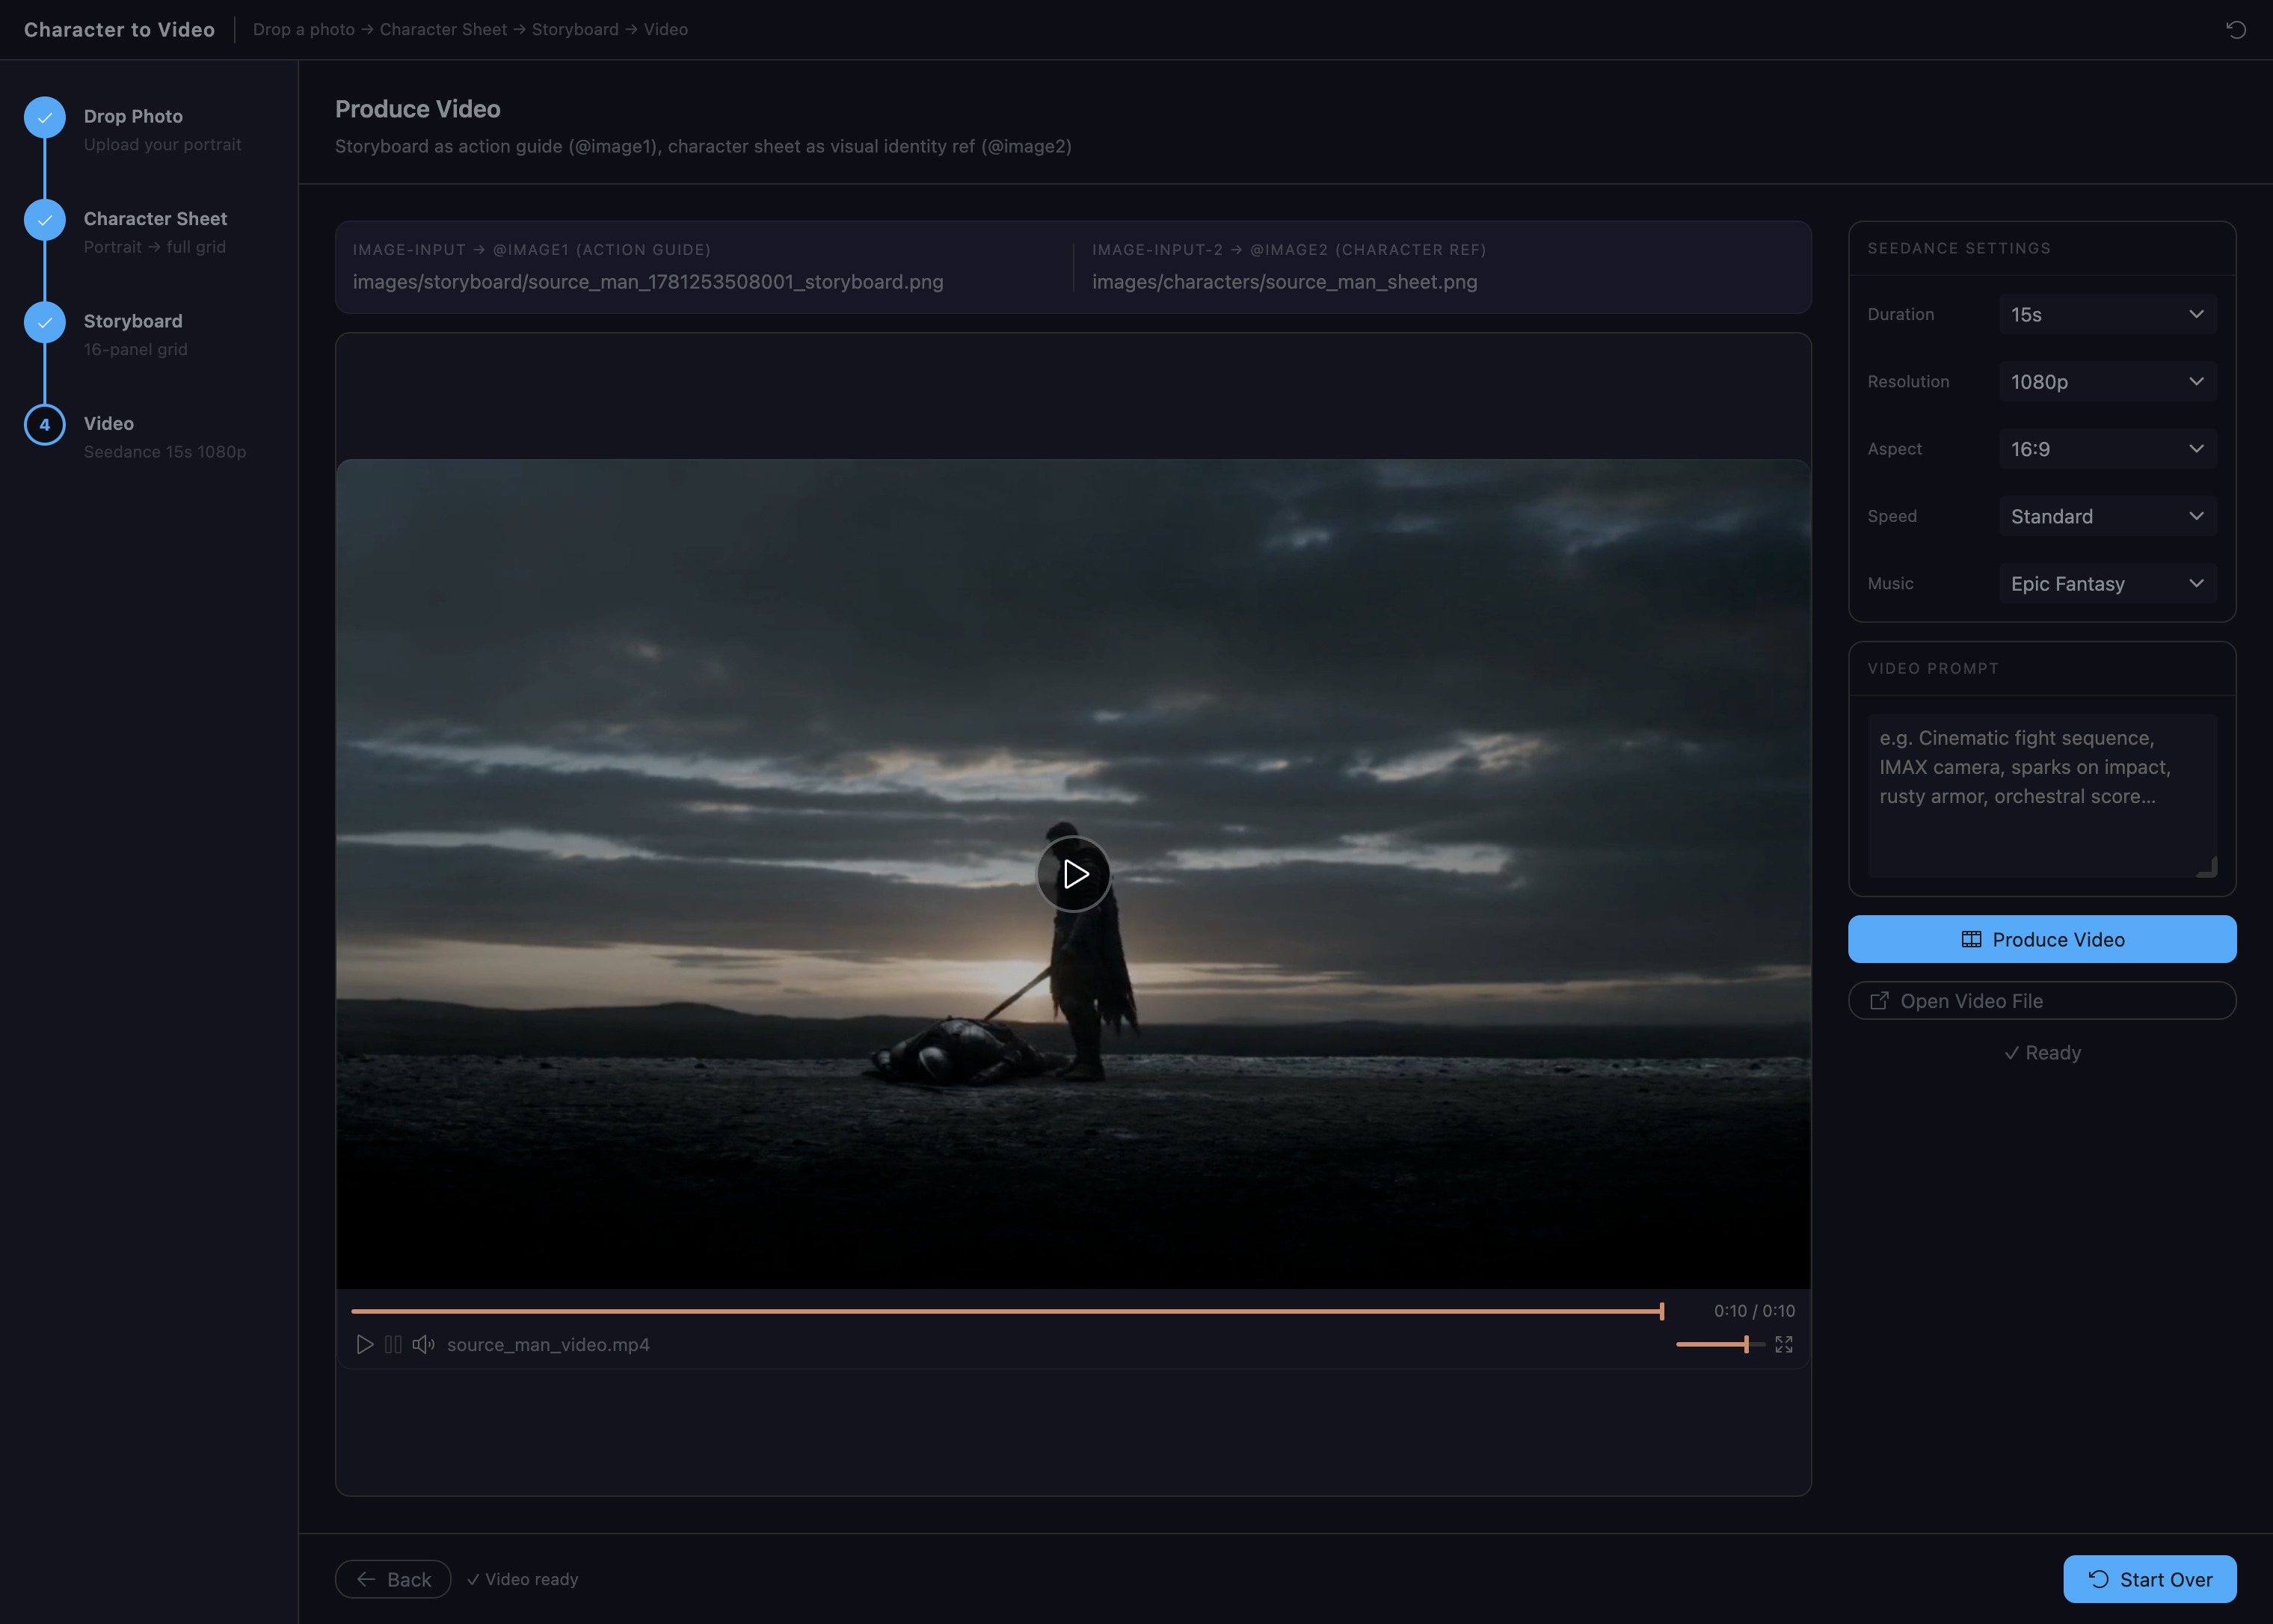
Seedance takes two inputs: the storyboard as the action guide and the character sheet as the visual identity lock. Settings panel on the right: duration, resolution, aspect ratio, speed, music genre.
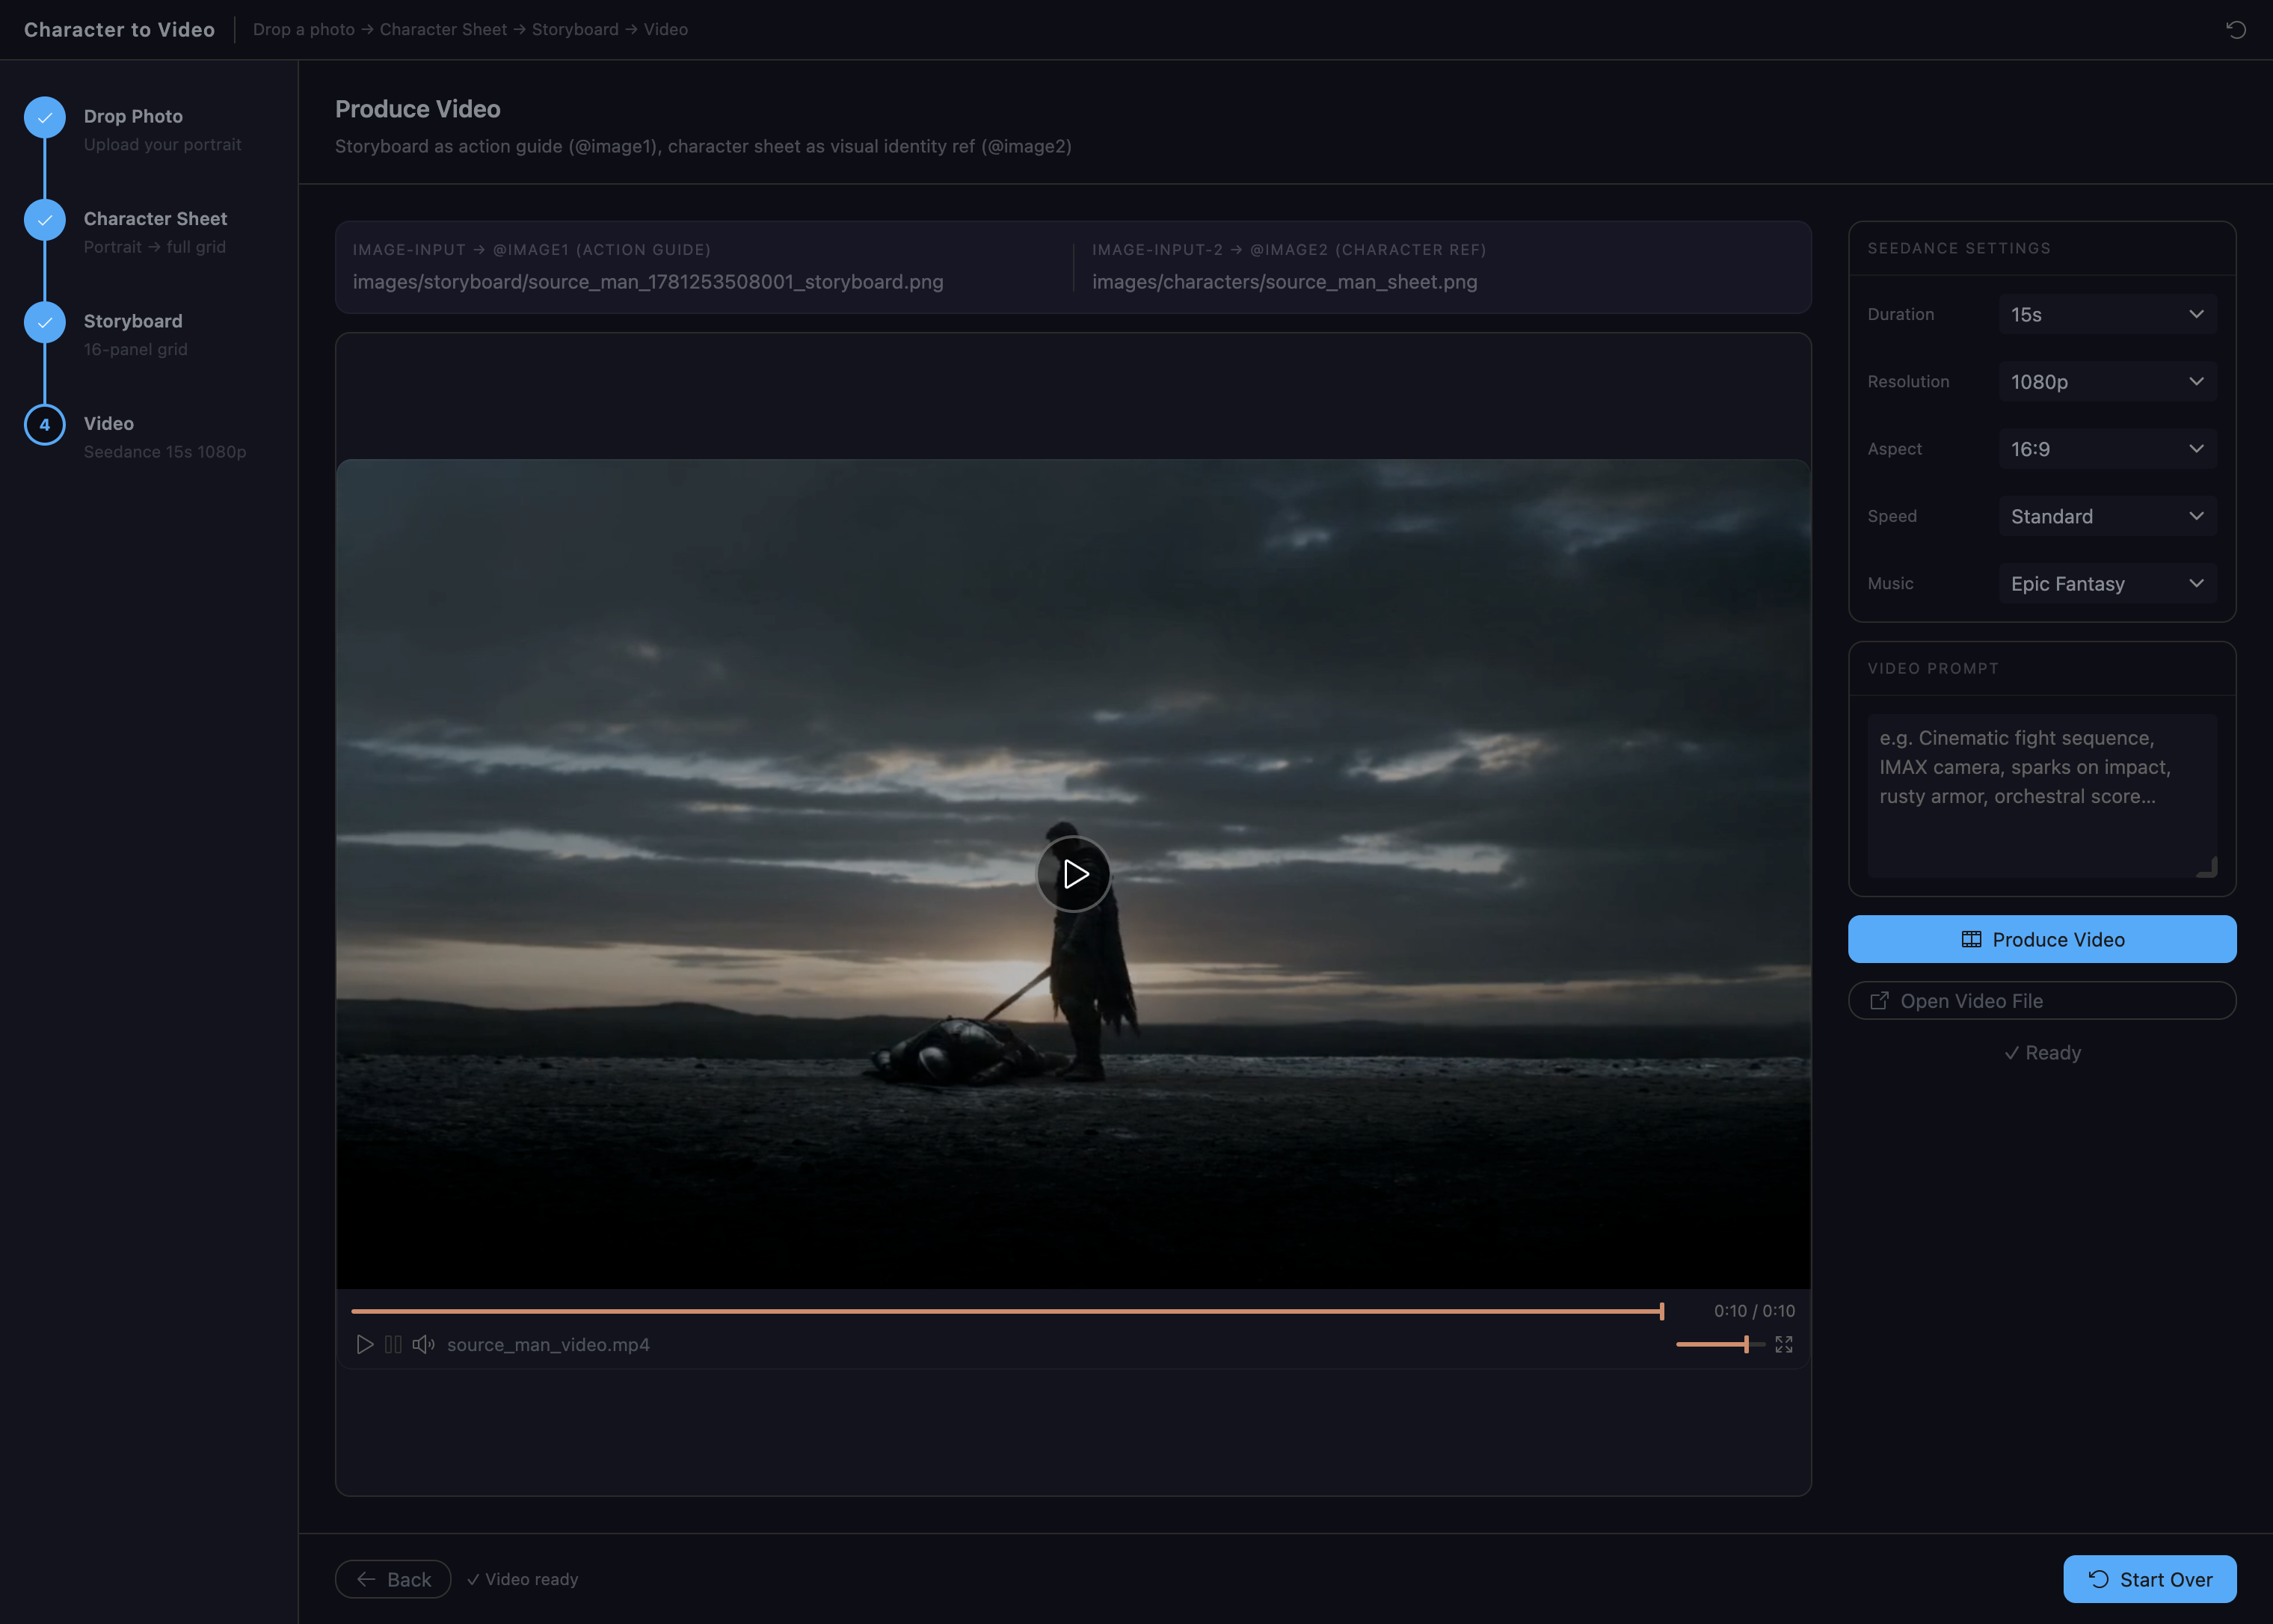
The result plays in the IDE-native video player with timeline scrubber, volume, and fullscreen. Both inputs are critical — without the character sheet the character drifts; without the storyboard the video has no narrative structure.
Pattern: dual image inputs. Always pass both storyboard and character sheet to the video model. One drives the action, the other locks the identity.
Walkthrough
Full end-to-end walkthrough — all 4 steps, scroll-through of the character sheet and storyboard, video playback:
Key Patterns
- Scenario on step 1 — collect all inputs upfront. The user describes the scenario once; every downstream prompt is built from it automatically.
- Editable prompts on each step — pre-fill from the scenario, show as a textarea, let the user tweak before generating. Builds trust and gives control.
- Two-step character sheet — always generate the initial portrait first, then use it as the image anchor for the full grid. Skipping this step causes face and outfit drift across panels.
- Storyboard before video — get the 16-panel sequence right first. Video generation is slow and expensive; the storyboard is fast and cheap to iterate.
- Dual inputs to video — storyboard as action guide + character sheet as identity lock. Missing either causes drift or loss of narrative structure.
- Session restore — save wizard state on every step transition. A wizard that loses progress on refresh is unusable.