
Inpaint & Outpaint with a Red Mask — Seedream 5 Pro vs Nanobanana vs GPT-Image-2

Product Owner
PO
show me inpaint and outpaint — erase something with a red brush and ask the model to fix it, then do a panorama: crop the edge, add a red zone, outpaint it, repeat, stitch. Seedream 5 Pro vs Nanobanana vs GPT-Image-2.

Designer
Lumi
sonnet
Two cases: (1) generate a photo, paint a solid red rounded-rect over one object with `draw_rect`, ask all three models to inpaint just that zone. (2) generate a photo, crop the right edge, expand it with a red zone, ask all three models to outpaint into it, crop the new edge, repeat once more, stitch the tiles into a panorama. Same inputs, prompt, 10%-width feather, and cross-fade stitching for Seedream 5 Pro, Nanobanana Pro, and GPT-Image-2.
Case 1 — Inpaint via a red-brush mask
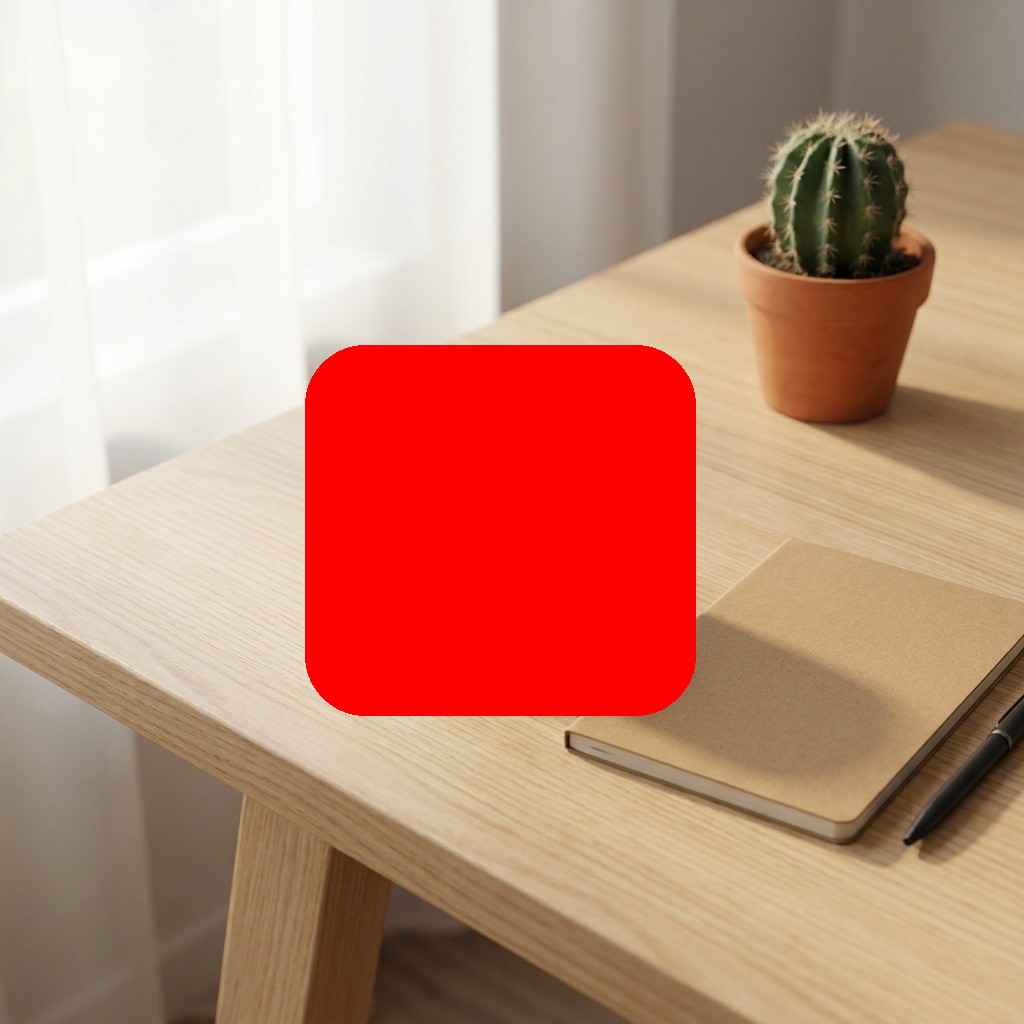
Generate a base photo, then use plain image tooling — no AI — to paint a solid red rounded rectangle directly over the object we want gone. Send that masked photo to each model with one instruction: fix the red zone, leave everything else alone.
UTILITY: nanobanana        # swap to: gpt_image
VERSION: pro
ASPECT_RATIO: 1:1
RESOLUTION: 1K

PROMPT: |
  Figure 1 shows a desk photo with a solid red rounded rectangle painted over one object.
  Inpaint: replace whatever is hidden under the red zone with a small potted succulent plant
  in a simple terracotta pot, sitting naturally on the desk in that same spot. Match the
  existing lighting, shadows, and photographic style exactly. Keep every other part of the
  photo — the notebook, pen, cactus, desk surface, curtains, background — completely
  unchanged. Do not leave any red or red tint anywhere in the output.

IMAGE-INPUT: public/posts/inpaint-outpaint-red-mask/images/case1-masked.png
FILE: public/posts/inpaint-outpaint-red-mask/images/case1-<model>.png
⚠️
IMAGE-INPUTmust be the full project-relative path, not a bare filename. Write it exactly likeFILE:—public/posts/.../case1-masked.png, notcase1-masked.png. A bare filename resolves to nothing and fails silently: the call still succeeds, but with zero image attached, so you get a pure text-to-image guess instead of an edit. This is the exact mistake that produced the first (broken) draft of this post — every “inpaint” below actually ignored the masked photo entirely until this was fixed.
The red mask itself is built with one non-AI tool call, no model involved:
draw_rect case1-base.png 305,345,390,370 case1-masked.png color=#FF0000 fill=true border_radius=60
Read: With the image reference correctly wired up, all three models replace the mug with a succulent. Nanobanana Pro and GPT-Image-2 are the most surgical here: their desk, notebook, pen, cactus, curtains, and framing remain near-identical. Seedream 5 Pro follows the marked region and makes a convincing replacement, but restyles more of the desk scene — useful regional editing, less strict pixel preservation. A painted red zone plus a real
IMAGE-INPUTreference is enough to make every model perform a grounded edit; the wrong full-path wiring initially made the calls silently fall back to ungrounded text-to-image.
Case 2 — Outpaint a panorama, one red zone at a time
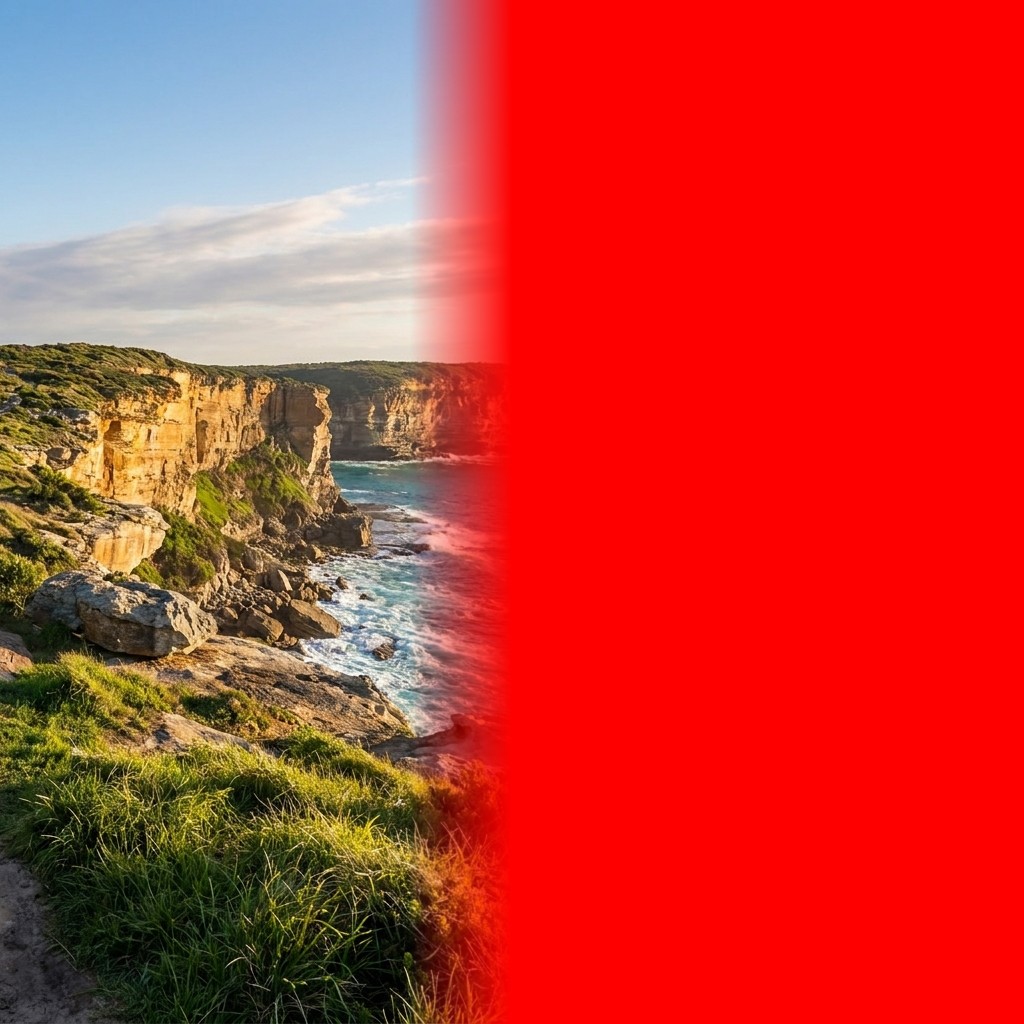
Same red-zone trick, chained sideways. Crop the trailing 512px of the image, expand it with a solid 512px red block on the right, ask the model to continue the scene into the red zone. Crop the newly-generated right edge out of that result, and repeat the same expand→outpaint→crop loop off the model’s own output. Two iterations per model, then stitch base + tile 1 + tile 2 into one panorama.
UTILITY: nanobanana        # swap to: gpt_image
VERSION: pro
ASPECT_RATIO: 1:1
RESOLUTION: 1K

PROMPT: Extend photo to red zone. Keep non red area intact.

IMAGE-INPUT: public/posts/inpaint-outpaint-red-mask/images/case2-<model>-iter{N}-canvas.png
FILE: public/posts/inpaint-outpaint-red-mask/images/case2-<model>-iter{N}-out.png
# iter1: half of the base + red / iter2: half of iter1's own output + red — same
# full-path rule as Case 1: bare filenames here silently drop the canvas reference too.
First pass at this used a long, heavily-qualified prompt trying to explicitly rule out every failure mode we hit along the way — duplicated content, mirrored content, exposure jumps, camera-angle jumps. It didn’t work reliably; the model kept finding new ways to break one constraint while satisfying the others. Dropping all of that in favor of the one-line prompt above fixed it outright on Nanobanana. GPT-Image-2 still showed a hard exposure/color seam at the join with a solid-red mask — the fix there wasn’t the prompt, it was the mask edge itself: feathering the boundary into a soft gradient instead of a hard cut.
Every canvas is built the same non-AI way — no model touches this step. A hard-edge red block is the naive version; use a 10%-of-canvas linear fade instead: 102px on this 1024px canvas. The entire 0→100% ramp stays on the real-photo side and ends exactly at x=512, where the solid red block begins. That removes the mask’s own hard edge without washing too far into the photo.
crop           case2-base.png       512,0,512,1024  context.png
expand         context.png  #FF0000 0,0,512,0       canvas-hard.png
draw_html_text canvas-hard.png      410,0,102,1024  feather_gradient.html  case2-iter1-canvas.png
# feather_gradient.html: linear-gradient(to right, rgba(255,0,0,0) 0%, rgba(255,0,0,1) 100%)
# 410 + 102 = 512: full fade ends at the true boundary
When stitching generated tiles, keep the same 102px context overlap and cross-fade it instead of hard-cutting:
stitch base.png tile1.png tile2.png horizontal panorama.png overlap=102 blend=crossfade
Two outpaint iterations, stitched into a 2048×1024 panorama, per model:
Read: With every full project-relative canvas correctly attached, all three models make a coherent two-hop coastline. Seedream 5 Pro gives the smoothest open-water continuation, Nanobanana Pro pushes toward a beach and headland, and GPT-Image-2 introduces the strongest golden-hour sun reflection. The same short prompt wins: “Extend photo to red zone. Keep non red area intact.” A 102px feathered mask plus a 102px cross-fade at final assembly keeps the joins soft. The practical rule remains: visually check each output before using it as the next iteration’s context — a valid call can still occasionally leave the red zone unfilled or drift in composition.
Case 3 — Bonus round: a full pixel-platformer level
Same feather + cross-fade recipe, pushed much further: instead of a 2048×1024 panorama from 2 iterations, chain 8 outpaint iterations off a single base tile to build a 10240×1024 side-scroller level background — a pixel-art Japanese city street at dusk. Tiles are generated at 2048×1024 instead of 1024×1024, so every measurement doubles: 205px feather/overlap (still 10% of tile width) instead of 102px. First tried on Nanobanana Pro alone to validate the approach over a much longer chain; GPT-Image-2 and Seedream 5 Pro followed once that held up.
UTILITY: nanobanana        # swap to: gpt_image / seedream
VERSION: pro
ASPECT_RATIO: 21:9   # closest native preset; 2048x1024 isn't a supported ratio
RESOLUTION: 1K

PROMPT: Figure 1 is a 16-bit pixel art Japanese city street. Extend photo to red zone, continuing the same pixel art style and lighting. Keep non red area intact.

IMAGE-INPUT: public/posts/inpaint-outpaint-red-mask/images/case3-<model>-iter{N}-canvas.png
FILE: public/posts/inpaint-outpaint-red-mask/images/case3-<model>-iter{N}-out.png
Every model needed its own path to a real 2048×1024 tile. Nanobanana’s 21:9 “1K” preset is documented as 2389×1024 but actually returns 1584×672 — confirmed on every call in the chain. Resize back up to 2389×1024 before any crop math, then crop to 2048×1024. GPT-Image-2 is the simplest of the three: it takes explicit
WIDTH: 2048 HEIGHT: 1024and returns exactly that, no off-ratio workaround needed. Seedream 5 Pro has no native 2:1 preset either, but itseditmode withIMAGE_SIZE: auto_2Kpreserves the input canvas’s aspect ratio exactly (returned 2912×1456, a clean 2:1) — just resize that down to 2048×1024, no cropping required. Same lesson as Case 1/2: never trust the requested/preset size, always verify actual dimensions after generating.
The full level: base tile + 8 outpaint iterations, stitched with the same overlap=205 blend=crossfade recipe as Case 2, delivered as WebP:
Read: All three models produce a fully joined 10240×1024 level with clean individual seams — no hard cuts, no red-mask residue, no duplicate/mirrored tiles surviving into the final cut (Nanobanana’s one bad iteration was just a plain retry). But all three also show the same underlying flaw at long chain length, just expressed differently:
- Nanobanana Pro drifts gradually from crisp, blocky pixel-grid art toward a smoother, flat-shaded “clean vector” look by the temple/torii-gate end — same palette, different linework density
- GPT-Image-2 stays the most visually consistent tile-to-tile of the three; style holds up well across all 8 hops with only minor lighting drift
- Seedream 5 Pro shows the strongest deviation: partway through the chain it swings from warm dusk lighting to a noticeably darker, blue-toned night palette, and doesn’t fully swing back — the most visible style break of the three, though every individual join still reads as continuous
No individual seam looks wrong in isolation, because each outpaint call only ever sees its immediate left-hand neighbor — style drift accumulates gradually with nothing forcing it back toward the original tile0 reference. Longer outpaint chains need an explicit style anchor (e.g. re-attaching tile0 as a style/color reference every few iterations), not just “match the adjacent tile.”
Visual Check
Product Owner
PO
Verify visually on each stitch.
Designer
Lumi
Visual check complete. Case 2 (2 joins each): Seedream 5 Pro — PASS. Nanobanana Pro — PASS. GPT-Image-2 — PASS. Case 3 (8 joins each, all three models): all PASS on individual seams — no hard cuts, no duplicate/mirrored tiles, no red-mask residue. Long-chain style drift is visible on all three by the far end of the level, most on Seedream, least on GPT-Image-2 — noted in the writeup, not a stitch failure.
Key Learnings
IMAGE-INPUTneeds the full project-relative path, not a bare filename — this bit us directly while building this post. A bare filename resolves to nothing and fails silently: the generation call still “succeeds,” it just runs as blind text-to-image with zero reference attached. The symptom looks exactly like “the model ignored the mask” — different notebook, different curtains, different everything — which is a very convincing but wrong diagnosis. Always write it the same way asFILE:, e.g.public/posts/x/images/y.png.- Once actually grounded, a painted red zone works across all three models — Nanobanana Pro and GPT-Image-2 preserve the surrounding pixels most strictly; Seedream 5 Pro follows the region but is more willing to restyle nearby context. None need an alpha-channel mask API for this basic red-zone workflow
- Chained outpaint holds up across iterations too, as long as each hand-off is correct — two iterations stitched into a 2048×1024 panorama remain coherent for Seedream 5 Pro, Nanobanana Pro, and GPT-Image-2 once every intermediate canvas is a real reference and not a silently-dropped one
- Simpler prompts beat over-specified ones — a long prompt trying to explicitly forbid every failure mode we saw (duplication, mirroring, exposure jumps, camera jumps) kept trading one problem for another. One plain line — “Extend photo to red zone. Keep non red area intact.” — outperformed all of them, on both models. Don’t over-engineer the instruction before trying the obvious one first
- A hard-edge mask can itself cause the seam it’s supposed to prevent — even with the simple prompt, GPT-Image-2 kept producing a visible exposure/color jump exactly at the solid red block’s boundary. The fix wasn’t prompt wording: it was feathering the mask edge into a 10%-of-canvas gradient fade instead of a hard line
- Finish the fade at the real mask boundary, then cross-fade the final tiles — the 102px
ramp (10% of 1024px) runs entirely on the real-photo side and reaches pure red precisely where
the solid red region begins. For the assembled panorama, retain those same 102px from each tile
as overlap and stitch with
blend=crossfade, rather than hard-cutting the generations. This softens any remaining model-level mismatch at each join without making the input fade overly broad - Non-AI tooling does the actual masking/canvas work —
draw_rectfor the inpaint blob,crop+expandfor the outpaint canvas; the model only ever sees “here’s a photo with a red patch, fill the patch,” it never has to reason about coordinates or pixel math itself - Still expect occasional flakes, not systematic failure — one Nanobanana outpaint call returned the canvas with the red zone left completely unfilled; a retry fixed it immediately. Verify each tile before chaining the next iteration off it, especially on longer panoramas
- Long outpaint chains drift in style even when every seam looks clean, on all three models — pushing the same recipe to 8 chained iterations (Case 3) built a fully coherent 10240×1024 level with no hard joins on Seedream 5 Pro, Nanobanana Pro, and GPT-Image-2 alike, but each drifted stylistically by the far end in its own way: Nanobanana from crisp/blocky pixels toward smoother flat-shading, Seedream from warm dusk to a cooler night palette (the strongest shift of the three), GPT-Image-2 the most stable. Each call only ever sees its immediate neighbor, so nothing anchors it back to the original reference — worth re-attaching the first tile as a style reference every few hops on chains this long
- Per-model tile-size workarounds differ even for the same target resolution — getting a
clean 2048×1024 tile took three different tricks: crop back down from an oversized native
preset (Nanobanana), request the exact size directly (GPT-Image-2’s explicit WIDTH/HEIGHT), or
let edit-mode auto-detect the input canvas’s aspect ratio and just resize the output
(Seedream’s
auto_2K). No universal shortcut — verify actual returned dimensions per model, every time - This is genuinely fast to prototype — same 3-command loop (crop, expand, edit) works identically against either model, so testing “does this trick work well enough for my use case” costs one afternoon, not a new pipeline — as long as you get the paths right